Top 5 Paint Colors for 2018

One of the easiest ways to change the look of a home is just to paint all the interior walls. By the time your professional movers bring your furniture back in, a coat of paint in a trendy color can make the whole house look more stylish and up to date. These five paint colors are trending for 2018 because they look modern while also being easy to incorporate into your home decor.Top 5 Paint Colors for 2018

Glamorous Grays

Darker colors are definitely starting to come back in style for home paint, and this is one of the easiest ways to add some darkness to your color palette without overwhelming your home. Whether you want a soft blue gray or a deep stony gray, it is easy to find the right shade for your home. Gray lends a sleek and understated elegance to any home.

Youthful Yellows

This cheerful color evokes memories of sunshine even on the gloomiest of days. Bright yellow may be one of the most Instagrammable colors, but most homeowners are going for a slightly more understated option. Pale lemon shades or rich goldenrod finishes brighten up a space and bring plenty of energy to it.

Powerful Pinks

Of course the pastel “millennial pink” shade remains a favorite for 2018, but that is not the only way that home designers are starting to use pink on the walls. For 2018, rich berry shades of pink are also becoming more popular. They add warmth without making a room look too busy or bright, so it is definitely a great option.

Bold Blues

Keeping up with the trend of darker and stronger colors, the winning shade of blue this year is a rich cobalt hue. When combined with white, it lends a fresh, Mediterranean look, or you can choose a more muted variant with grays and lavenders to create a soothing place to relax.

Gentle Greens

There are two green hues that are dominating color trends for 2018. In areas where you want a calming design, try a soft sage green. This lighter color with hints of gray has a pleasant and natural feel. Those who want a deeper shade should consider a darker emerald shade. This bold color is surprisingly easy to match, and it makes a room look luxurious and impressive.

Painting each room will not only transform your home, but it will also increase your real estate value. When you decide to move we highly recommend hiring movers – I can’t say this enough! They spared the walls and I didn’t have to worry about last minute touch ups. Use globally recognized professional movers like Suddath and you’re sure to save time and money.

Related Home
Zen Your Home Out With These Gorgeous Decorating Ideas
Tips on Gathering Ideas For Your Home Decorating Projects
Millennial Pink- Is Lavender the color of the year
Going for Plenty of Color and Pattern to Decorate Your Home?

Craft Project: DIY Patchwork Pillow

If you have a few different types of fabrics sitting around, one of your options is to make a patchwork pillow! These pillows are great because they are unique and cute but they are also very easy to make. Even if you are just learning how to sew, the steps to follow are rather straightforward and won’t present too much of a challenge. Don’t forget that you can personalize this project by adding your own personalized tag or custom-made label. You can design label online, print it, attach to the project and sell it on Etsy as a part of your brand. step by step instructions for sewing cushions in the style of the patchwork

1. Gather Your Materials

When you are creating a patchwork pillow, the first thing that you need to do is to gather all your materials. The great thing about a patchwork pillow is that you get to work with multiple patterns, so you don’t have to settle on one type of fabric when you choose. You also don’t have to worry about working with patterns in a sense of matching them up perfectly because the whole point of a patchwork pillow is that it doesn’t match.

A good idea for beginners, though, is to stick with patterns from the same type of fabric. This way, you won’t have to account for different types of materials – cotton is the easiest choice for beginners.

At this point, you will also want to gather other materials you will need such as scissors, thread, rotary cutter, a self-healing mat, as well as pins and needles. In later steps, you will need an iron as well as stuffing for the pillow.instruction patchwork pillow

2. Prepare Your Materials

For the next step, you will want to cut your fabric into squares of equal squares. You can use scissors for this step but an easier option would be to use your rotary cutter atop your self-healing mat. Make sure to measure extremely carefully – you want all your squares to be exactly the same size.

For our patchwork pillow, we will be using four different fabrics. So, for each fabric we will want four square. instruction patchwork pillow step 2

3. Start Stitching

For some patchwork pillows, you only need from this point to sew your squares together. For this pillow, though, we are going to make each of our patches of two fabrics. So, one square will be a triangle of one fabric and a triangle of another fabric.

To achieve this, in this step you will take two different types of fabric squares and sew a seam down the center – from corner to corner. It is important that you sew the squares so that the “right side” of the fabric is facing toward each other. This leaves the fabric connected but also allows you to peel the edges of the fabric squares away from each other. instruction patchwork pillow Step 3

4. Break Out the Iron

Next, you will need to make sure that each of your sewn-together squares is showing half of each fabric. Remember how you kept the “right side” of the fabric turned in? That’s because in this step you will be folding the corner of the top layer of fabric back. The end result should be two halves of different fabrics showing face up.

To get this fold to stay before you sew the squares together into a pillow, you will want to press it into place. To do this, just use a regular clothing iron and iron the square into position. instruction patchwork pillow Step 4

5. Sew Your Patches

The next step is to sew your patches together. You can arrange them in the pattern that you want for your pillow and then then just sew them together at the edges. Once you have done that, you will want to sew strips of fabric at each side of the square of patches so that you have a border on the pillow. Then, repeat steps 1-4 so that you have a second side to your pillow.

When you are done, you can sew the two sides together. However, leave one side open for now.

6. Finishing Touches

Before you close the final side of your pillow, you will want to add in your pillow’s stuffing. Once you have done that, you can sew the final side of the pillow shut. Filling the pillow with stuffing

Other Craft Projects:
4 Great DIY Family Arts And Crafts Activities
Terracota Painted Pots: DIY Crafting
Everything you need to quilt and sew at Craftsy.com

Zen Your Home Out With These Gorgeous Decorating Ideas

Zen-Your-Home-Out-With-These-Gorgeous-Decorating-IdeasWe live in a fast, hectic world where there is hardly ever a time to take a break, collect our thoughts and enjoy the moment. But when those rare moments do come, they are usually in our homes. Our oasis of peace where we can relax and let go of the worries of the world. However, this can’t happen in a home that is full of mess and lacks organization. And to help that further, the décor in our home can be something that helps us get in the right state of mind.

So let’s take a look at how we can make our home the relaxing getaway that we need it to be.

Before the decor

Before-the-decorating-you must de-clutter

First things first: piling decoration on top of a messy, cluttered room will produce absolutely no positive effect. The first step to any redecoration is the cleanup. You have to get rid of any things that don’t add to your peace or joy. This goes for furniture as well as decoration. Once the excess things are out, you need to think about the way you want to arrange it all. Move the furniture around until you find the perfect balance. You want plenty of light and good orientation. You also want enough space to comfortably walk around the furniture.

When everything is in place, a big cleaning is in store. Wipe everything down and deep clean any furniture that needs it. Let fresh air in and spend some time in the room when it is so clean and plain, thinking about what you feel would add to space. Then get to it!

Include all senses

Include-all-senses-in-your-home
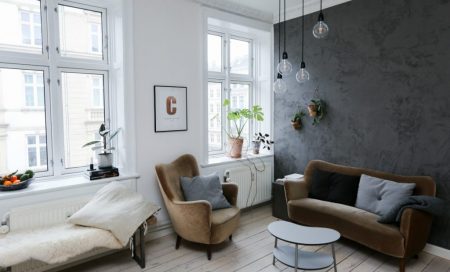
To be truly at peace, we want to include all of our senses into the experience. This means you don’t want only art around the room that is nice to look at, but also something to feel and something to smell. Firstly, you want a nice mixture of textures to touch. This can mean a fluffy carpet on a part of the room, while the rest of the floor is natural hardwood. Or it can be a mixture of textures on the pillowcases on the bed.

Next, you want to make sure there is always a pleasant scent in the air. This can mean getting an air purifier to get rid of any bad smells, but also getting scented candles, incense sticks or strategically placing citrus peels and salt lamps, there are plenty of health benefits.

Bring in nature

Bring-in-natureWe really don’t have a lot of time to spend outdoors in nature, which is why it’s important that we bring nature inside. If you have a room in your house that doesn’t have any plant life in it – it’s time to change that. If you can’t handle the responsibility of taking care of so many plants, natural looking artificial flowers are a great option. They will give you the feeling of being connected with nature, without the commitment.

You can try to have some kind of theme going through the plants in your house, like plants that require moisture being in the bathroom, herbs in the kitchen, flowers in the bedroom and large potted plants in the living room. It will help you relax and it is very healthy for our bodies.

Stick with a natural palette

Large Lynne Fluted Hurricane Candle Holder and Vase
Very bright colors and ones that aren’t usually seen in nature won’t make us feel relaxed. You want to try and stick to natural, earthy tones that make you feel like you are in nature. This goes for walls, floors and all of the furniture. If you want a pop of color, try to keep it in the natural category, preferably through plants, fruit platters and other natural sources. If you are buying new furniture, natural is the way to go. Wood looks beautiful in any setting, and there are so many different wood textures to choose from nowadays. Having an all-natural palette will bring the space together and make it feel more comfortable for you when trying to relax.

Help yourself lead a more mindful and relaxed life by giving yourself the space to be at complete peace. Remember that, to maintain this state, you have to regularly declutter and clean it, which can be a very calming activity in itself. Tailor the space to your needs and don’t let anyone interfere with your comfort.

More to read…..
How To Make A Bedroom Zen
5 Tips to Transform Your House Into a Home
A Touch of Glimmer in Your Home: Decorating with Metallic Finishes

*This post may contain affiliate links, which means I might receive a small commission if you make a purchase using a link.
Shop for wedding décor by color at Luna Bazaar

Free Mother’s Day Printables

With Mother’s Day around the corner, it’s the perfect time to reflect on the many memories and moments with mom.

She has watched you grow, been there for you for the good times and the hard times, but most importantly, shown you how to be the best mom! That’s why Personal Creations has put together a tutorial on how to create a memory jar.

First, DIY a jar or box that you’d like to give her, then print out the printables. Customize your printables with memories that the two of you have shared, and place them in your jar. Mom will be thrilled to open a gift filled with love and special moments this Mother’s Day! jar-mock-up (1) close-up-early (1) sentimental-heartfelt-mockup (1)

For your memory jar you can use the printables to decorate and  then fill your jar and can
click on picture or ⇒ Open Printable Here
And for more details you can check out
How To Make a Memory Jar

If you would like to learn more about Personal Creations for all occasions you can go to Personal Creations Blog
And you can find them on Twitter 

This post contains affiliate links

HTML Snippets Powered By : XYZScripts.com