How to Build the Infrastructure of Your Art and Craft Studio?

Building an infrastructure for a good art and craft studio is as important and serious a job as making an office. When you make an office, you bring in the best items in office supplies, hardware and furniture to make the infrastructure, and when you make a crafts studio or sewing corner, then also you need the best range online to make the best place for you and team to hone the creative side.Crafts Online

How to arrange an art and craft studio?

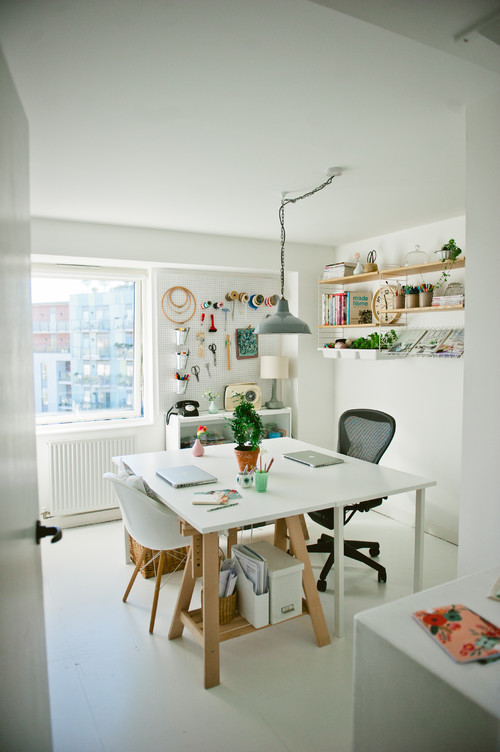
Developing an art and craft studio needs some understanding of the basic requirements and some excellent planning. The beauty and planning behind carving out a studio would in future inspire every piece of artwork coming out of that studio’s womb. That is why it’s very important that you use the best quality instruments and equipment in adorning the workspace and utilise your investment in the most productive way.

It makes no sense in investing in cheap instruments which may not last well, and also give you faulty or compromised finishing thereby hindering your quality of the artwork. Instead, you must invest in high-quality tools and the best range online available for art and craft making. Such high-quality accessories and tools for working would be available the best on online shops dedicated to selling craft tools mainly.

Adorning your design studio

To start with you should make a list of all the items you will need in your workshop or studio. And then you can check with the best range online and see if the item you are looking for is available in the range. High-quality tools can have no alternatives because you also know that once you invest, you will keep on reaping the benefits out of them. You won’t have to think about replacements, tool discomfort, handling errors etc., with the best quality crafting tools.

Every high-quality cutting and shaping, measuring and punching tool contain measurements and specifications for the material and the type of things they are apt for, and how they should be used. Reading the details help select better. And when you pick your items from one of the dedicated online shops, then you are always in an advantageous position with the purchase.

Do gala research on tools you would purchase

If you decide to use the best range online for developing your art and craft design workshop, then you must read in detail about the top global art and craft tool manufacturers and their innovative tools to know more and access your options. The more you do the research, the more gates open before you, and you can select innovative tools and equipment for enhancing your skills, beautifying designs, reducing human labour and time, and make things faster with more beauty and perfection.

Finally

Some global leaders are makers of the best quality art and craft making equipment and online shops who deal with such top manufacturers will always have their items in their inventory.

Related:
4 Great DIY Family Arts And Crafts Activities
DIY: Four Fun Basic Textile Projects To Do In A Weekend

Craft Project: DIY Patchwork Pillow

If you have a few different types of fabrics sitting around, one of your options is to make a patchwork pillow! These pillows are great because they are unique and cute but they are also very easy to make. Even if you are just learning how to sew, the steps to follow are rather straightforward and won’t present too much of a challenge. Don’t forget that you can personalize this project by adding your own personalized tag or custom-made label. You can design label online, print it, attach to the project and sell it on Etsy as a part of your brand. step by step instructions for sewing cushions in the style of the patchwork

1. Gather Your Materials

When you are creating a patchwork pillow, the first thing that you need to do is to gather all your materials. The great thing about a patchwork pillow is that you get to work with multiple patterns, so you don’t have to settle on one type of fabric when you choose. You also don’t have to worry about working with patterns in a sense of matching them up perfectly because the whole point of a patchwork pillow is that it doesn’t match.

A good idea for beginners, though, is to stick with patterns from the same type of fabric. This way, you won’t have to account for different types of materials – cotton is the easiest choice for beginners.

At this point, you will also want to gather other materials you will need such as scissors, thread, rotary cutter, a self-healing mat, as well as pins and needles. In later steps, you will need an iron as well as stuffing for the pillow.instruction patchwork pillow

2. Prepare Your Materials

For the next step, you will want to cut your fabric into squares of equal squares. You can use scissors for this step but an easier option would be to use your rotary cutter atop your self-healing mat. Make sure to measure extremely carefully – you want all your squares to be exactly the same size.

For our patchwork pillow, we will be using four different fabrics. So, for each fabric we will want four square. instruction patchwork pillow step 2

3. Start Stitching

For some patchwork pillows, you only need from this point to sew your squares together. For this pillow, though, we are going to make each of our patches of two fabrics. So, one square will be a triangle of one fabric and a triangle of another fabric.

To achieve this, in this step you will take two different types of fabric squares and sew a seam down the center – from corner to corner. It is important that you sew the squares so that the “right side” of the fabric is facing toward each other. This leaves the fabric connected but also allows you to peel the edges of the fabric squares away from each other. instruction patchwork pillow Step 3

4. Break Out the Iron

Next, you will need to make sure that each of your sewn-together squares is showing half of each fabric. Remember how you kept the “right side” of the fabric turned in? That’s because in this step you will be folding the corner of the top layer of fabric back. The end result should be two halves of different fabrics showing face up.

To get this fold to stay before you sew the squares together into a pillow, you will want to press it into place. To do this, just use a regular clothing iron and iron the square into position. instruction patchwork pillow Step 4

5. Sew Your Patches

The next step is to sew your patches together. You can arrange them in the pattern that you want for your pillow and then then just sew them together at the edges. Once you have done that, you will want to sew strips of fabric at each side of the square of patches so that you have a border on the pillow. Then, repeat steps 1-4 so that you have a second side to your pillow.

When you are done, you can sew the two sides together. However, leave one side open for now.

6. Finishing Touches

Before you close the final side of your pillow, you will want to add in your pillow’s stuffing. Once you have done that, you can sew the final side of the pillow shut. Filling the pillow with stuffing

Other Craft Projects:
4 Great DIY Family Arts And Crafts Activities
Terracota Painted Pots: DIY Crafting
Everything you need to quilt and sew at Craftsy.com

4 Great DIY Family Arts And Crafts Activities

Finding fun arts and crafts ideas that you haven’t done with your family before is difficult. Especially when each new idea you find requires buying more supplies. Which is why we thought these 4 DIY’s would be a great way to utilize the things you already have laying around the house or garden. 4-Great-DIY-Family-Arts-Crafts-Activities

We’ll take a look at:

  1. Making games with sticks and twigs
  2. Cloud dough
  3. Swishy gel bag
  4. Treasure sensory instrument

Making up games using sticks and twigs

Other than the obvious sword fighting games, you can use sticks and twigs to create new games that are more fun for every family member. A great example of this is making stick sculptures with the help of elastic bands to hold them in place.

Resource-Pinterest
Summer Star Twig Ornaments

Get creative with this and ask your kids to design their own games – they’ll come up with much more imaginative ideas than us adults will.

Another idea using natural objects from the garden for arts and crafts, is to design pictures with leaves, flowers and other flat things. You can then place the end result in a frame, pressing them together with plastic panes from Simply Plastics.

Colourful cloud dough

Resource-Pinterst
Making Cloud Dough

An idea from pbs.org is to cook up a batch of coloured cloud dough. As the recipe says on their site, you’ll need:

  • Flour
  • Oil
  • Oil or gel-based food colouring
  • Glitter or any additional decoration

Your end result should look a little like this image from their website:Colourful-cloud-dough

Squishy gel bags

Resource-Pinterest
Making Sensor Squishy Bags with Buttons

As strange as this one sounds, creating squishy gel bags are a great way for your kids to explore a new world of sensory play. For those of you who haven’t heard of sensory play, it’s exactly what you’d expect!

Sensory play is all about letting your kids explore their senses; smell, sound, touch, taste and sight. Hence, a squishy gel bag is perfect for your kids to explore touch, sound and sight. Maybe even smell, if you added some essential oils to the mix.

Hands-On-As-We-Grow-Nature-Sensory-Bag-Suncatcher
Source: Hands On As We Grow / Nature-Sensory-Bag-Suncatcher

What will you need?

  • Leak-proof sealable, see-though plastic bags
  • Gel, washing up liquid, oil or paint (keep in mind paint will dry)
  • Glitter and any other additional textures

All you need to do, is get your kids to stick all your chosen ingredients into the bag and seal it up. It can prove handy when they’re bored, just get out their squishy gel bags and let them have fun squishing it as much as they like! As long as they don’t squeeze it so much it bursts.

You can find the full guide on making squishy gel bags here.

Treasure sensory instrument

Yet another sensory arts and crafts idea. Taken from Mumstown, you can learn about how to make one here.

Treasury-Sensory-Instrument
Image Source: Mumstown

In brief, you’ll need a jar and some objects to fill up the jar. All you’re going to be doing here is filling it up with seeds, rice and anything that makes a noise when shaken.

Do you have any ideas?

If you’ve got some interesting arts and crafts ideas for the rest of our reader, please don’t hesitate to tell us all about them in the comments. Anyway, have fun creating these with your family!
Shared:
Across The Blvd Beautiful Made Linky Party

This post may contain automatically and manually added affiliate links, which means I might receive a small commission if you make a purchase using a link at no extra cost to you.

HTML Snippets Powered By : XYZScripts.com