5 Aussie BBQ Beef Recipes You Need to Try

The traditional Australian cuisine mainly revolves around meat, particularly beef and lamb. While opinions may defer, in our humble one, we feel the best way to enjoy meat is to grill it, since it adds a rich flavour to meals. Not only can you barbecue at your home, but the public parks are also equipped with barbecue stations where you can prepare beef and other delicious foods.

 5-Aussie-BBQ-Beef-Recipes-You-Need-to-Try.

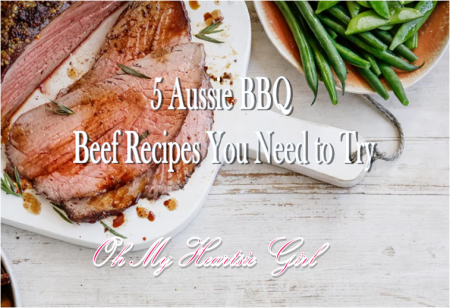
While you can add a variety of spices to meat to enhance its flavour, here are a few top Australian beef recipes to make your meals even more delicious:

Broome Beef Satays

Ingredients

  • 1 kg beef steak
  • 2 tbsp crushed garlic
  • 2 lemongrass stalks, thinly slice the white part
  • 1/3 cup soy sauce
  • 2 tbsp onion, fine chopped
  • 1/3 cup white sugar
  • 2 tsp salt
  • 2 tsp coriander, ground
  • 2 tsp cumin, ground

For Peanut Sauce

  • 2 tsp vegetable oil
  • ½ onion, fine chopped
  • 500g peanut butter
  • 3 tsp sugar
  • 1 tsp salt
  • ¼ cup tomato sauce
  • ½ cup coconut cream
  • 1 tbsp soy sauce

Instructions

  1. Marinate beef with all the ingredients. Mix well.
  2. Cover the bowl with a lid and refrigerate it overnight.
  3. Soak bamboo skewers in cold water for half an hour and then thread the marinated beef onto them.
  4. Heat a barbecue plate. Lightly oil it and cook satay skewers for 5 minutes.
  5. Cover with foil and set it aside.
  6. Meanwhile, heat oil in a saucepan.
  7. Add onions and cook for 5 minutes.
  8. Stir in water, salt, peanut butter, tomato sauce, cream, soy sauce, and sugar. Mix well.
  9. Spread the sauce over beef skewers and serve.

Australian Rissoles

Ingredients

  • 1 lb beef, ground
  • 1 cup breadcrumbs
  • 1 onion, fine chopped
  • 1 tbsp fresh parsley, chopped
  • ½ tsp dried herbs
  • Flour
  • 1 egg, beaten

Instructions

  1. Mix all the ingredients, except flour.
  2. Form small balls and flatten them.
  3. Take flour in a bag and add 2 rissoles at a time.
  4. Shake gently and then barbecue rissoles for 10 minutes each side.
  5. Serve when warm!

Garlic Steaks

Ingredients

  • 1 kg beef fillet steaks
  • 1 bulb garlic, cloves separated, peeled and sliced
  • Salt and ground black pepper, for taste

Instructions

  1. With a sharp knife, punch holes into the steak and stuff them with garlic.
  2. Cover the bowl and refrigerate for 4 hours.
  3. Preheat a grill pan at high heat.
  4. Place steaks on the grill pan. Cook for 5 minutes.
  5. Turn steaks, season with salt and pepper and cook until they are done.

Steak with Roast Sweet Potato

Ingredients

  • 4 beef rib-eye steaks
  • 1 kg sweet potato
  • 3 tablespoon olive oil
  • ½ bunch fresh thyme

Instructions

  1. Preheat oven to 180 °C.
  2. Line two baking trays with baking paper and spread sweet potatoes. Season with olive oil.
  3. Bake for 40 minutes.
  4. Meanwhile drizzle steaks with oil, salt, and black pepper and cook until they turn brown.
  5. Serve steaks with sweet potatoes and mustard.

You should try out these easy barbecue recipes to prepare scrumptious meals in no time!

Best Ways on How to Cook Your Favorite Steak

The taste of a perfectly cooked steak is unbeatable. Whether you prefer filet mignon, top sirloin, or any other cut bought with a discount code, when a steak is properly cooked its flavor is at its peak. However, a steak that’s not well made can be tough, dry, or have an unappealing texture due to being way undercooked.

To make the perfect steak, you need to have the appropriate equipment, and having the right gear can make the steak that you are trying to cook unforgettable. The right grill can change the way you look at cooking and can also improve the taste of all the food that you prepare, for instance, an electric grill guide from bistecchieraelettrica.net will provide you with all the information you need to know if you want help finding the perfect grill that can fit your all-purpose kitchen. Meat is a vital part of our diets, and we should be allowed to enjoy all the tastes that it has to offer by grilling it!–

Get prepared

Steak cooks best when it’s at room temperature. Take the meat out of the fridge and let it sit at room temperature for one hour before you cook it. During this time, prepare your seasonings and get your space ready to make the steak. A good quality steak needs little else than a sprinkling of salt and cracked black pepper, but some people prefer to add minced garlic, crushed pepper flakes, or other spices. Less is more here, as the simpler the seasoning the more the flavor of the meat will come through.

Another key component of preparing to cook a great steak is using a hot pan or grill. You want to sear the outside of the meat to make a crust, which is what will help seal in the juices and give the steak a wonderful taste. To cook your steak in a pan, preheat it over medium-high heat for at least 10 minutes. It’s best to use a cast iron, stainless steel, or good quality non-stick pan to cook the meat. Best-Ways-on-How-to-Cook-Your-Favorite-Steak

Start Cooking

After the meat has rested and your pan is well heated, season the steak to your liking. Lightly rub it with olive oil and then put the spices on both sides of the meat. Using sturdy tongs, place the steak in the center of your pan and allow it to sear. Turn the steak to the other side after a minute, and repeat the turning process every minute thereafter. You’ll want to do this for a total of six minutes. Continuing to turn the steak during cooking helps it cook evenly over the high heat.

Adding Flavor

If you like the taste of garlic in your steak but don’t want to use garlic powder or minced garlic — which tends to burn once it comes in contact with the super-hot pan — cut open a clove of garlic and carefully rub it over the steak each time you turn it. This will impart garlic flavor without your steak being covered in burnt bits. Another way to give the steak flavor is to rub it with butter every turn or butter that’s infused with herbs. To add herbs that are not incorporated into the butter, wait until the steak’s final two turns and then sprinkle the herbs on top of each side. Adding herbs before this point could result in them getting burnt.

After your steak is done cooking, help the meat retain its juices by allowing it to rest before cutting it. Take the meat off the heat, rub it with a bit of plain or herbed butter or olive oil, and let it sit on a warmed plate for about 10 minutes. A steak cooked this way can be enjoyed with any side dishes and can also easily stand alone with no other accompaniments. Try this method the next time you make a steak and it’ll become your favorite way to cook meat.
[…]
Home Series: How To Set Up Your Kitchen For Easy Cooking
Cooking Series: 6 Tips to Increase the Flavor of Your Dishes

This post may contain affiliate links and I might receive compensation if you make a purchase after clicking on a link.
NatureBox - Delicious Snacks Delivered to You

Gluten-Free Carrot Cake Very Moist Very Fluffy

Gluten-Free-Carrot-Cake-Very-Moist-Very-Fluffy
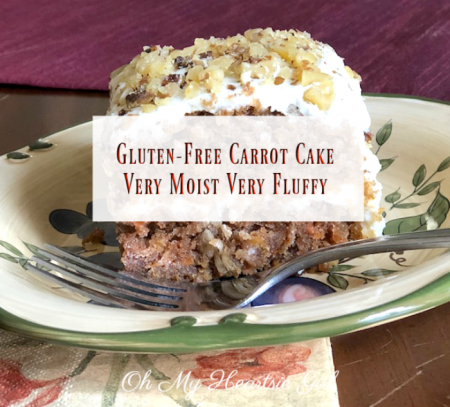
I just have to share this recipe, it is absolutely amazing and tastes almost identically to a carrot cake recipe I made all my life, however, this recipe has a secret and I would have never believed that changing one ingredient (well a mixture) could make this fluffy, moist and great tasting. I could fool my kids, in fact for Mother’s Day I made it to serve as a dessert after our BBQ and my sons girlfriend and her kids had no clue that this cake is glutenfree and made with a flour mixture that has sweet white Rice flour, Brown rice flour, potato starch, white sorghum flour, tapioca flour, and Xanthan gum but its all in one mix, I use “Bob’s Red Mill 1 to 1 Baking Flour“. 

You can use this literal cup for cup in recipes that you have been using wheat or white flour. So many people are finding out that eating wheat causes all sorts of problems, celiac disease, bloating and a whole other topic.  And in November I switched to gluten-free baking and I have lost 26 pounds. I make my own bread with another gluten-free grain called Teff flour, which is really good for sandwiches,  you can check that Brown Sandwich Bread with Teff Flour Gluten Free.

As you can see the recipe still calls for regular sugars so I’m going to experiment next time and try some alternatives like coconut sugar or erythritol. Coconut sugar can be used in place of white sugar in recipes cup for cup, but there are so many other options. Here is a chart for options from Bigger Bolder Baking

So about this Carrot Cake, it has a good crumb and does not have a gritty texture like some gluten-free recipes that call for almond flour or coconut flour and it is super moist as you would want a carrot cake to be.  But let me tell you, this cake is absolutely delicious with a traditional cream cheese frosting and chopped walnuts on top.

I don’t have the round cake pans, so I made 2 square 8″x 8″ cakes and stacked them. And if you like a lot of icing you might want to double the icing recipe. I like just the amount the recipe makes and it was plenty. I reserved more for the top and less between and used more on the top and sides It was just right for me and no one said a word.

When mixing the cake it is important not to use a Kitchen-Aid or any kind of electric mixer for this recipe, the reason is your cake will not turn out fluffy. There are tricks when using gluten-free flours and I found a good source of tips on America’s Test Kitchen; Keys to Successful Gluten-Free Baking   And another hint, I like to leave the cake on counter for about 5 minutes before baking as it gives the baking soda and baking powder a chance to start raising to give that fluffy texture.

When baking the cake I used parchment paper to line the pans after spraying the pans so I could lift them out to cool.

I waited about 5 minutes and then carefully lifted the cakes out of the pan onto cooling racks. You want to make sure your cakes are completely cool before frosting.

After you icing, the cake put it in the fridge to chill and keep remaining cake thereafter serving, if there’s any left. I did send a large section home with one of my son girlfriends son, he loved it!!! And I didn’t want to have too much leftover, because I would eat it all!! 

1 cup white sugar
½ cup brown sugar, packed
1 cup canola oil or vegetable oil
3 eggs
2 cups Red Mills gluten-free baking flour
1½ teaspoons baking powder
1 teaspoon baking soda
½ teaspoon salt
1 tablespoon cinnamon
½ cup buttermilk
1 tablespoon pure vanilla extract
2-3 cups carrots, finely shredded (I used a little over 2 cups)
½ cup pureed carrots (I cooked carrots and put in food processor)
½ cup sweet coconut flakes, finely shredded

FROSTING (double the recipe if you like a thick layer of frosting)
8 oz cream cheese, room temperature
4 tablespoons butter, room temperature
2 cup confectioners sugar (may need more to thicken if desired)
1 teaspoon pure vanilla extract
1 cup walnuts, chopped
Directions:
Preheat oven to 325 F.
Grease cake pans I use parchment paper in pans (or grease and flour pans) Set aside
In a large bowl cream together oil, sugars, and eggs. Set aside.
In a separate bowl whisk together flour, baking powder, baking soda, salt and cinnamon.
Gradually add the dry ingredients into the wet ingredients, alternating with the buttermilk.
Mix just until fully combined. (careful not to over mix) [Do not use a mixer]
Fold in shredded & pureed carrots, coconut flakes and vanilla extract.
Pour batter evenly into prepared pans.
Bake for 20-25 minutes until center is set. (do not over bake!)
Lift cakes carefully out of pan and set on cooling racks or place pans directly into freezer to cool.
While cakes are cooling prepare the frosting by first creaming together the butter and cream cheese.
Add in the confectioners sugar and vanilla extract.
Mix until silky and creamy. Add more sugar if a thicker texture is needed.
When cakes are cooled remove them from pans and frost, sprinkling the tops with walnuts.

Now, if you make this recipe you have to let me know if you try it and think its as good as I do. This recipe was adapted from Divas Can Cook and I can tell you she is spot on with her recipe and she has great hints for other moist cakes and desserts.

Dave’s Carrot Cake

This is our first Guest Post and Jared has graciously allowed us to share his famous “Dave’s Carrot Cake“recipe, if you try it we would love to hear your comments on guest posts. 
 Visit his website as well.
Thank you Jarred
Original Post April 23, 2013 Reposted May 2, 2018

About Jared

My name is Jared, and I’m still not entirely sure how I ended up living in paradise.
My partner ‘Rick’ and I (he’s shy, so that’s not his real name) are two American city boys who moved to rural New Zealand in 2006. We live on 20 acres just outside the charming wine and olive village of Martinborough, at the bottom of the North Island.

It’s a little different from where I grew up, which was the suburbs outside Detroit. I used to stay out till 5am dancing at clubs downtown, where we were frisked at the door for guns and knives. Now I get up at 5am to do yoga, write, and feed the chickens. Go figure.

carrot-cake-close-up Moon Over Martinbrough
“Dave’s Carrot Cake”

2 cups flour (For gluten free, replace flour with gluten free baking mix. I use Bakels.)
2 cups sugar
2 tsp cinnamon
2 tsp baking soda
2 tsp baking powder
1 tsp salt
1 and 1/2 cups cooking oil (I use canola.)
4 eggs
3 cups carrots, finely grated
1 cup chopped walnuts (optional)

Sift dry ingredients together. Add oil, stirring constantly.
Add remaining ingredients and mix.
Place in two round springform pans. Bake at 350 °F / 175 °C for 45 minutes.

Frosting
1 package cream cheese (8 oz / 250 g)
1/2 cup butter
2 tsp vanilla
1 pound of icing sugar! (16 0z = 453 g)

Jared blogs at Moon Over Martinborough   Link updated
Would you like to be a guest for a favorite recipe and share your blog,
Fill out this form Guest Writer 
HTML Snippets Powered By : XYZScripts.com